Initial Study Setup
Overview
A study raw dataset contains all raw data and metadata on a study, across all acquisitions and participants. It is typically created just prior the first (pilot) acquisition. Its purpose is to record all data in their raw, unaltered form, as provided by the respective acquisition machinery. Moreover, it is used to bind data from multiple acquisition sources (e.g. MRI, eye tracker, ECG) together, to create a reliable record of what data were recorded at which point on what hardware. Importantly, this also includes the logs of any stimulation setup, or behavior responses that are typically generated by paradigm implementations provided by individual researchers.
The study raw dataset should capture all information required to reproduce any subsequently performed data analyses.
A study raw dataset is supposed to have a subdirectory for each acquisition. The name of this directory is the acquisition identifier as far as the tools described here are concerned. Each of those acquisition directories should contain all relevant data of an acquisition. Most notably they contain a subdataset dicoms and a specification file to curate required information for conversion . It is recommended to group other data according to its source and nature similarly (i.e. have a physio subdirectory alongside the dicoms subdirectory). The study raw dataset should also contain custom code needed for conversion in order to provide reproducibility.
Preparation
Data management relies on datalad and datalad-hirni respectively, which is an extension to datalad to provide additional functionality for this platform. Start off by installing datalad-hirni.
Dataset creation
To create a study dataset you just need to run:
datalad rev-create [TARGET-DIR]
If you don't provide a target dir, the dataset will be created in the current working directory. This will create an empty datalad dataset.
To preconfigure it to be a study dataset however, you need to run a dedicated setup procedure from within the dataset:
cd [TARGET-DIR]
datalad run-procedure setup_hirni_dataset
This command will do several things to make this a study dataset. Apart from setting some configurations like enabling the extraction of DICOM metadata, it will create a default README file, a dataset_description.json template file, an initial study specification file and it will install hirni's toolbox dataset as a subdataset of my_raw_dataset. Note, that by default the toolbox is installed from github. If you need to install from elsewhere, you can set the datalad.hirni.toolbox.url config to point to another URL prior to running setup_hirni_dataset.
- You can now use hirni's webUI to edit the study metadata and thereby fill the dataset_description.json file.
- This step can be postponed or repeated later on to complete it. There's no technical need to fill it out completely (or at all) at this point. It is recommended to do it as far as you can though.
The dataset is now ready for importing acquisition data.
Step-by-step demo
This is a simple example showing how to create a study dataset with datalad-hirni and how to import data into such a dataset. The raw data we use for this demo is publicly available from two example repositories at github. For reference what this data is about, simply visit https://github.com/datalad/example-dicom-functional/ and https://github.com/datalad/example-dicom-structural/ in your browser. For all commands to work in the exact form shown here, create a directory for that demo first and switch into it:
% mkdir demo
% cd demo
Creating a raw dataset
First off, we need a study raw dataset to bundle all raw data in a structured way:
% datalad rev-create my_raw_dataset
% cd my_raw_dataset
% datalad run-procedure setup_hirni_dataset
The first command will create a datalad dataset with nothing special about it. The last, however, runs a hirni procedure, that will do several things to make this a study dataset. Apart from setting some configurations like enabling the extraction of DICOM metadata, it will create a default README file, a dataset_description.json template file, an initial study specification file and it will install hirni's toolbox dataset as a subdataset of my_raw_dataset. Note, that by default the toolbox is installed from github. If you need to install from elsewhere, you can set the datalad.hirni.toolbox.url config to point to another URL prior to running setup_hirni_dataset. It now should like this:
% tree -L 2
.
├── code
│   └── hirni-toolbox
├── dataset_description.json
├── README
└── studyspec.json
And from a datalad perspective like this:
% datalad ls -r
.                    [annex]  master  ✗ 2019-02-28/12:37:01  ✓
code/hirni-toolbox   [annex]  master  ✗ 2019-02-27/21:23:59  ✓
We now have an initial study dataset and should start by editing the study metadata, which is stored in dataset_description.json. For convenience when doing this manually we can use hirni's web UI:
% datalad webapp --dataset . hirni
The output following this command should end reading Running on http://127.0.0.1:5000/ (Press CTRL+C to quit). Now this address can be opened in a browser and should look like this:
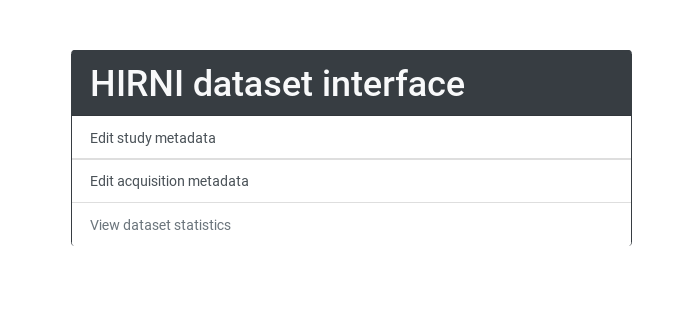
Choose "Edit study metadata" (we have no acquisition yet) to get to this form:
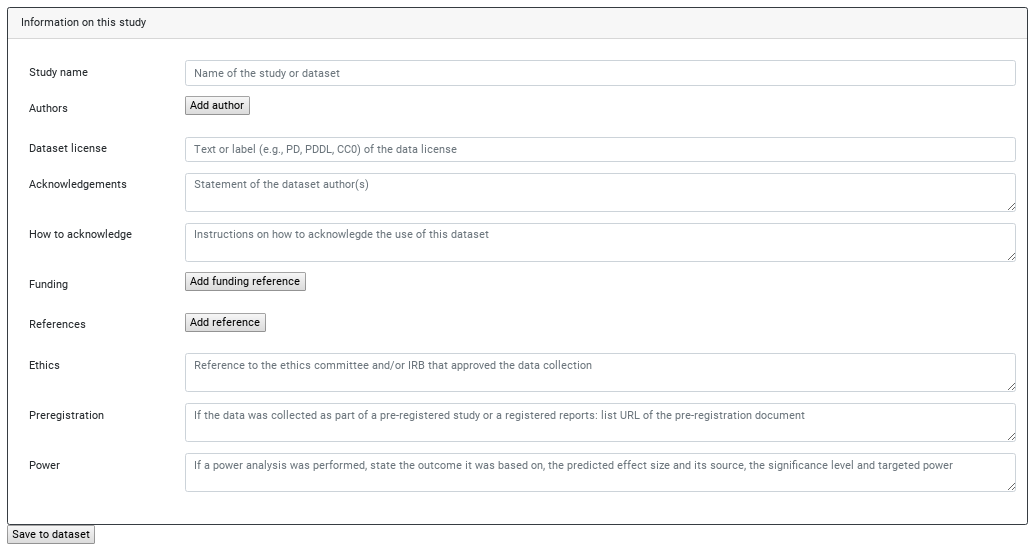
It's not required to fill this at this point (technically it's not required to be filled at any point), but generally recommended to record whatever information you have ASAP into that dataset. Its recorded history is just as useful as you allow it to be.
Acquiring data
Now, we want the actual data. To import a DICOM tarball into the study dataset, there is a dedicated hirni command hirni-import-dcm. This will add the DICOMS to our dataset, extract metadata from their headers and derive a specification for each series it finds in those DICOM files. A hirni study dataset is supposed to put all data of each acquisition into a dedicated subdirectory, which also contains a specification file for that acquisition. We can give the command a name for such an acquisition or let it try to derive one from what it finds in the DICOM headers. Everything that is automatically concluded from the metadata can be overwritten by options to that command, of course. Something that can't automatically be derived, of course, are anonymized subject identifiers. This association will be needed for anonymized conversion. You can add those IDs later, of course, but we can do it right from the start via the option --anon-subject. datalad hirni-import-dcm can import such tarballs either from a local path or an URL. For this demo we use the above mentioned example data available from github:
% datalad hirni-import-dcm --anon-subject 001 https://github.com/datalad/example-dicom-structural/archive/master.tar.gz acq1
This should create a new acquisition directory acq1, containing a studyspec.json and a subdataset dicoms. Note, that this subdataset contains the original tarball itself (in a hidden way) and the extracted DICOMS. As long as we don't need to operate on the DICOM files, we don't really them to be there. We can throw their content away by calling:
% datalad drop acq1/dicoms/*
This should result in the DICOM files having no content. We can get them again any time via datalad get acq1/dicoms/*. Import the second acquisition the same way:
% datalad hirni-import-dcm --anon-subject 001 https://github.com/datalad/example-dicom-functional/archive/master.tar.gz acq2
Note, that this imports and extracts metadata from about 6000 DICOM files. It will take a few minutes. This time we have something else to import for that acquisition: the events file. Generally, you can add arbitrary files to the dataset. Protocols, logfiles, physiological data, code - it is meant to bundle all raw data of study. The functional data already provides an events.tsv file and therefore we can find it already in the dicoms subdataset we just created. Since such a file is usually not included in a DICOM tarball you'd start with, lets pretend it's not actually in that archive and import it separately again. We use git annex addurl to retrieve that file and then save the new state of our dataset by calling datalad rev-save:
% git annex addurl https://github.com/datalad/example-dicom-functional/raw/master/events.tsv --file acq2/events.tsv
% datalad rev-save --message "Added stimulation protocol for acquisition 2"
NOTE: The calls to git annex addurl and datalad rev-save currently replace a single call to datalad download-url due to a bug in that command.
Please note, that the choice where exactly to put such a file within an acquisition directory is entirely up to you. datalad-hirni doesn't expect any particular structure within an acquisition. As long as the specification files are correctly referencing the locations of the data, everything is fine. Now, for a later conversion there is no general conversion rule for tsv files. We need to tell the system what it is supposed to do with that file (if anything) on conversion. For that, we add a specification for that file using hirni-spec4anything. This command allows to add (or replace) a specification for arbitrary things. By default it will generate a specification that already "inherits" everything, that is unambiguously uniform in the existing specifications of that acquisition. That means, if our automatically created specification for the functional DICOMs managed to derive all required BIDS terms (in this case it's about "subject", "task" and "run") and their values for the dicomseries, spec4anything will use that as well for the new specification (except we overrule this). So, all we need to do here, is to specify a conversion routine. For correct BIDS conversion we only need to copy that file to its correct location. Such a "copy-converter" is provided by the toolbox we have installed at the beginning. Editing or adding such a specification is again possible via the webUI. For the purpose of this demo, however, we will this time use the command line to show how that looks like:
% datalad hirni-spec4anything acq2/events.tsv --properties '{"procedures": {"procedure-name": "copy-converter", "procedure-call": "bash {script} {{location}} {ds}/sub-{{bids-subject}}/func/sub-{{bids-subject}}_task-{{bids-task}}_run-{{bids-run}}_events.tsv"}, "type": "events_file"}'
What we pass here into the properties option is a JSON string. This is the underlying structure of what you can see in the webUI. The necessary quoting/escaping at the command line is admittedly not always easy for manual editing. Note, that instead of such a string you can also pass a path to JSON file. (and more generally: All of datalad and the datalad-hirni extension is accessible via a Python API as well) For a more extensive description of the specification (and therefore those properties) see the specification page.
If you ran all the commands in this demo the exact same way as posted, your dataset should now look exactly like this: https://github.com/psychoinformatics-de/hirni-demo For comparison you can examine it on github or install it locally to have a closer look via:
% cd ..
% datalad install -s https://github.com/psychoinformatics-de/hirni-demo --recursive
We now bound all information on that study and its acquisitions in its native, absolutely unmodified form together in a dataset that can now serve as a starting point for any kind of processing. This dataset is much less likely to suffer from software bugs than a ready-to-analyze dataset with NIfTIs etc, but the software stack that actually touched the data files is minimal.